There’s something deeply enchanting about wearing a flower crown. Maybe it’s the way it makes you feel like a woodland fairy or a goddess walking through a sun-dappled field. Whether you’re heading to a picnic, festival, photoshoot, or simply want to add a little magic to your day, crafting your own DIY flower crown is easier than it seems—and endlessly customizable.
In this comprehensive guide, we’ll walk you through everything you need to know about making a flower crown, from choosing the right flowers to assembling your dreamy headpiece. This DIY flower crown tutorial will have you creating Instagram-worthy accessories in no time.
Disclosure: This post contains affiliate links. When you purchase through these links, I may earn a small commission at no additional cost to you. This helps support the blog and allows me to continue sharing forest-inspired fashion finds with you.
🌼 What You’ll Need for Your DIY Flower Crown
You don’t need a florist’s toolkit to make a beautiful flower crown. Just gather a few simple supplies:
- Floral wire (18 to 22 gauge, thin and flexible)
- Floral tape (green is traditional, but brown works too)
- Wire cutters
- Greenery (eucalyptus, ferns, or ivy for the base)
- Fresh or faux flowers (roses, daisies, baby’s breath, chamomile, lavender, peonies)
- Optional: Ribbon to finish with a bow in the back
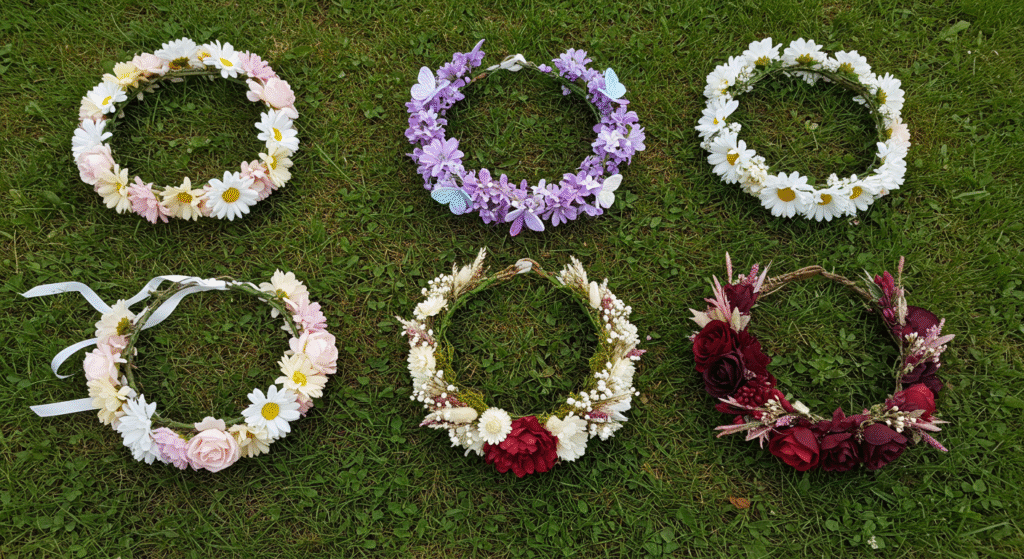
🌿 Choosing Your Flower Crown Aesthetic
Before you dive into this DIY flower crown project, think about the vibe you’re going for:
Cottagecore Flower Crown: Think soft roses, peonies, daisies, and sprigs of wildflowers. Mix in trailing greenery for a dreamy, overgrown garden feel that’s perfect for romantic photoshoots.
Fairycore Style: Use smaller, delicate flowers like forget-me-nots, violets, and baby’s breath. Add faux butterflies or tiny crystal charms for extra whimsy.
Boho Flower Crown: Go for earthy tones and dried elements like wheat, pampas grass, and muted roses in dusty pink or terracotta shades.
Festival Ready: Bright, bold blooms like sunflowers, marigolds, and dahlias with colorful ribbon accents that photograph beautifully.
Romantic Minimalism: Stick with a monochrome palette—perhaps all white or blush—with simple greenery for an elegant, timeless look.
🌸 How to Make a Flower Crown: Step by Step Tutorial
Step 1: Measure and Form the Base
Wrap the floral wire around your head to get a comfortable fit, positioning it where you’d like the crown to sit. Leave about 2 inches of extra wire on each end for securing. Twist the ends together to form a circle, creating loops at each end for adjustability. Double the wire for added stability if you plan to use heavier flowers.
Step 2: Wrap with Greenery
Using floral tape, begin wrapping pieces of greenery around your wire base. Start at one end and work your way around, overlapping the tape as you go. This creates structure and provides a natural background for your flowers. Keep in mind that you’ll need about 1 1/2 inches per end to form adjustment loops.
Step 3: Prepare Your Flowers
Trim your flower stems to about 2 inches long, cutting at an angle for better water absorption if using fresh flowers. For fresh flowers, cut stems to 1 1/2 inches long. If you’re using faux flowers, you may need wire cutters to trim plastic-coated stems. Remove any leaves that would sit below the wire base.
Step 4: Attach the Flowers
Start adding flowers one by one, beginning at one side of the crown. For bolder focal flowers, consider garden roses, orchids, peonies, and anemones. Lay each flower along the wire base and secure the stem with floral tape, wrapping tightly but not so tight that you damage the stem. Work in one direction, overlapping each flower slightly for fullness.
Step 5: Build Layers and Texture
Mix different flower sizes and textures as you work around the crown. Place larger blooms first, then fill in with medium flowers, and finish with the smallest details. Hardy flowers like carnations, solidago, wax flowers, and astrantia work well because they can be out of water for extended periods.
Step 6: Fill in the Gaps
Once your main flowers are placed, step back and assess your DIY flower crown. Fill any sparse areas with smaller blooms, sprigs of greenery, or delicate filler flowers. Baby’s breath, wax flower, and tiny buds work perfectly for this step.
Step 7: Add Finishing Touches
If you want ribbon ties, attach two 12 inch ribbons to the wire loops at the back of the crown. This makes your flower crown adjustable and adds an elegant finishing touch. You can also weave thin ribbon through the flowers for added color and texture.
🌷 Pro Tips for a Long-Lasting DIY Flower Crown
For Fresh Flowers:
- Store your finished crown in the refrigerator in a plastic bag with a bit of moisture until you’re ready to wear it
- Mist lightly with water before wearing
- Choose hardy flowers that can withstand being out of water
- Make your crown the day you plan to wear it for best results
For Artificial Flowers:
- These last forever, making them perfect for costume pieces, home decor, or reusable photo props
- Clean with a soft brush or gentle cloth
- Store carefully to maintain shape
Mixed Media Crowns:
- Combine dried and faux flowers for an all-season look that’s lightweight and durable
- Add silk flowers to fresh greenery for the best of both worlds
🌻 Perfect Occasions for Your DIY Flower Crown
Your handmade flower crown is perfect for:
- Garden parties and outdoor weddings
- Music festivals and summer concerts
- Engagement, maternity, or senior photo shoots
- Renaissance fairs and themed events
- Spring celebrations and Easter gatherings
- Everyday magic—because life’s too short not to wear flowers in your hair
🌺 Flower Crown Variations to Try
Baby Flower Crown: Use smaller, delicate flowers and a thinner wire base for little ones. Focus on soft textures and lighter colors.
Bridal Flower Crown: Incorporate white roses, peonies, and baby’s breath with elegant ribbon ties. Add small pearl or crystal accents for extra glamour.
Seasonal Crowns:
- Spring: Tulips, daffodils, and fresh green foliage
- Summer: Sunflowers, daisies, and bright wildflowers
- Fall: Dried leaves, berries, and muted autumn flowers
- Winter: Evergreen sprigs, pinecones, and white flowers
🌼 Troubleshooting Your DIY Flower Crown
Crown feels too loose? Add padding with extra greenery or adjust the wire loops for a better fit.
Crown feels heavy? Use fewer large blooms and more delicate filler flowers, or switch to high-quality artificial flowers.
Gaps showing through? Layer more greenery as your base, or add additional small flowers and foliage to fill spaces.
🌸 Caring for Your Flower Crown After Wearing
If you used fresh flowers, you can extend their life by:
- Carefully removing individual flowers and placing them in small vases
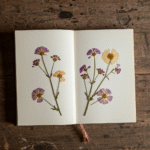
- Pressing flowers between book pages for keepsakes
- Composting natural materials responsibly
For artificial flower crowns:
- Store in a box with tissue paper to maintain shape
- Keep away from direct sunlight to prevent fading
- Gently reshape any bent elements
🌿 Let Your Imagination Bloom
There’s truly no wrong way to make a DIY flower crown. Whether you choose a lush halo of peonies, a dainty ring of chamomile, or a bold statement piece with tropical blooms, your creation will be a reflection of your personal magic and creativity.
The beauty of learning how to make a flower crown lies not just in the final product, but in the peaceful, meditative process of working with flowers. Gather your supplies, maybe put on a forest-inspired playlist, and let yourself get lost in the rhythm of wrapping, taping, and arranging.
Remember, each flower crown you create is unique—just like you. Some may be perfectly symmetrical, others charmingly wild and organic. Both are beautiful in their own way.
So go ahead, embrace your inner flower child and create something that makes you feel magical. Because sometimes, the world feels just a bit more enchanting when there are flowers in your hair, and you’ll have the satisfaction of knowing you made every petal placement with your own hands.
Whether this is your first DIY flower crown or your fiftieth, may it bring you joy, confidence, and a connection to the natural beauty that surrounds us every day. Happy crafting! 🌸
Related posts:
 DIY Cottagecore Room Decor: 8 Budget-Friendly Ways to Get the Look
 Pressed Flower Crafts: The Complete Guide to Creating Enchanting Botanical Art
 Fairycore Halloween Costume Ideas: 5 Magical Looks That Beat Basic Witch Every Time
 DIY Enchanted Decor: Winter Forest Fairy Lights, Jars & Upcycled Crafts
 Your Ultimate Guide to Fairytale-Inspired August Picnic Outfits