There’s something undeniably magical about pressing flowers. Whether you’re tucking them into a journal, framing them for wall art, or using them in your next DIY project, pressed blooms capture the beauty of nature in the most delicate way. This guide will walk you through everything you need to know to create stunning pressed flower crafts at home. No fancy equipment required (unless you want it!), just a touch of patience and a little love for botanical beauty.
This post contains a few affiliate links, which means I may earn a small commission (at no extra cost to you) if you make a purchase through them. Thank you for helping support more cozy, dreamy content like this!
Why Create Pressed Flower Crafts?

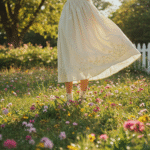
Pressing flowers is a centuries old tradition that pairs perfectly with aesthetic lifestyles like cottagecore, fairycore, or slow living. These delicate botanical treasures can transform into bookmarks, stationery embellishments, thoughtful gifts, or nostalgic keepsakes from special moments. The art of pressed flower crafts connects us to nature in the most intimate way, allowing us to hold onto fleeting beauty long after blooms have faded.
And it’s easier than you think it is.
Let’s break it down!
What You’ll Need
- Fresh flowers (avoid thick or juicy ones like succulents)
- Sharp scissors or garden shears
- Parchment paper, blotting paper, or plain white paper
- Heavy books or a flower press
- Optional: Tweezers for handling delicate pieces
Step 1: Choosing the Perfect Flowers

Not all flowers press equally well for pressed flower crafts. Look for flatter blooms like pansies, daisies, violets, or delicate ferns. Wildflowers and herbs like lavender or Queen Anne’s lace are also excellent choices. Pick them in the morning after any dew has dried but before the heat of the day wilts them. Make sure flowers are completely dry to prevent mold.
Pro tip: Collect flowers from meaningful places like your garden or special walks to make your pressed flower crafts feel more personal and magical.
Step 2: Preparation
Trim stems to your desired length and remove excess leaves. For thick flowers, consider slicing them in half lengthwise to reduce moisture. Arrange each bloom exactly how you’d like it to appear in your finished pressed flower crafts with the petals flat and naturally positioned.
Step 3: The Pressing Process
Book Method
- Place each flower between two sheets of absorbent paper
- Tuck the paper into a heavy book (one you don’t mind potentially warping)
- Add more books on top for consistent pressure
- Store in a dry place away from direct sunlight for 3 to 4 weeks
- Replace blotting paper every few days during the first week to prevent mold
Flower Press Method
- Layer flowers between blotting paper in your press
- Tighten screws evenly for consistent pressure
- Store in a dry, well ventilated area for 2 to 3 weeks
- This method provides better airflow and more even pressure
Step 4: The Reveal
After several weeks, carefully open your paper to discover beautifully flattened, dried flowers with soft, vintage colors. Handle these delicate treasures gently with tweezers, as they can be quite fragile when first removed.
Creative Pressed Flower Crafts Ideas
Enchanted Bookmarks: Laminate pressed flowers between clear materials for functional art that brings nature to your reading.
Memory Journals: Press flowers from travels or special celebrations, then incorporate them into journal entries about those meaningful moments.
Seasonal Décor: Frame favorite blooms from each season, creating rotating natural art for your home.
Handmade Stationery: Add botanical touches to greeting cards and letters, making your correspondence feel like tiny gifts.
Success Tips for Pressed Flower Crafts
- Avoid thick, water heavy flowers like tulips or lilies because they often develop mold
- Flowers naturally fade during pressing, creating beautiful vintage tones
- Experiment with layering different petals for unique textures
- Store finished pieces in dry, dark places between parchment paper
Creating pressed flower crafts is more than just a hobby, it’s a way of slowing down and carrying pieces of the outside world with you through changing seasons. Whether you’re preserving petals from your grandmother’s garden or creating art from wildflowers discovered on peaceful walks, each bloom becomes part of a larger story of natural beauty and mindful creation.
So gather your books, wander into the garden, and begin your journey into the enchanting world of pressed flower crafts. Let each delicate bloom remind you that beauty, once captured with care, can last far beyond its original season.
Related posts:
 How to Make a DIY Flower Crown: Your Complete Step-by-Step Guide
 The Complete Guide to Cottagecore: Embracing Simple Living and Rural Romance
 Finding Your Perfect Whimsical Aesthetic: A Complete Style Guide
 The Ultimate Fairytale Packing Guide: 10 Whimsical Essentials for Your Weekend Getaway
 9 Dreamy Things to Do Before Autumn Arrives: Your Ultimate Summer Bucket List